The next target in my web penetration testing series will be WebGoat. So, what is WebGoat?
WebGoat is a deliberately insecure web application maintained by OWASP designed to teach web application security lessons. In each lesson, users must demonstrate their understanding of a security issue by exploiting a real vulnerability in the WebGoat applications. The application is a realistic teaching environment, providing users with hints and code to further explain the lesson.
I used the standard install that contains the Java Runtime Environment and Tomcat server, in addition to the web application itself. If you follow the installation instructions you should be fine, but in case you get a Please set JAVA_HOME to a Java 1.6 JDK install message, remember to point the environment variable to your Java JDK location. In my case, it looked like this: export JAVA_HOME=/usr/lib/jvm/java-6-openjdk-amd64
Then navigate to http://localhost:8080/WebGoat/attack (or whatever port you used to start it on). The credentials are guest/guest. You can see from the menu that there are many attack categories. So, let’s begin!
General
HTTP Basics
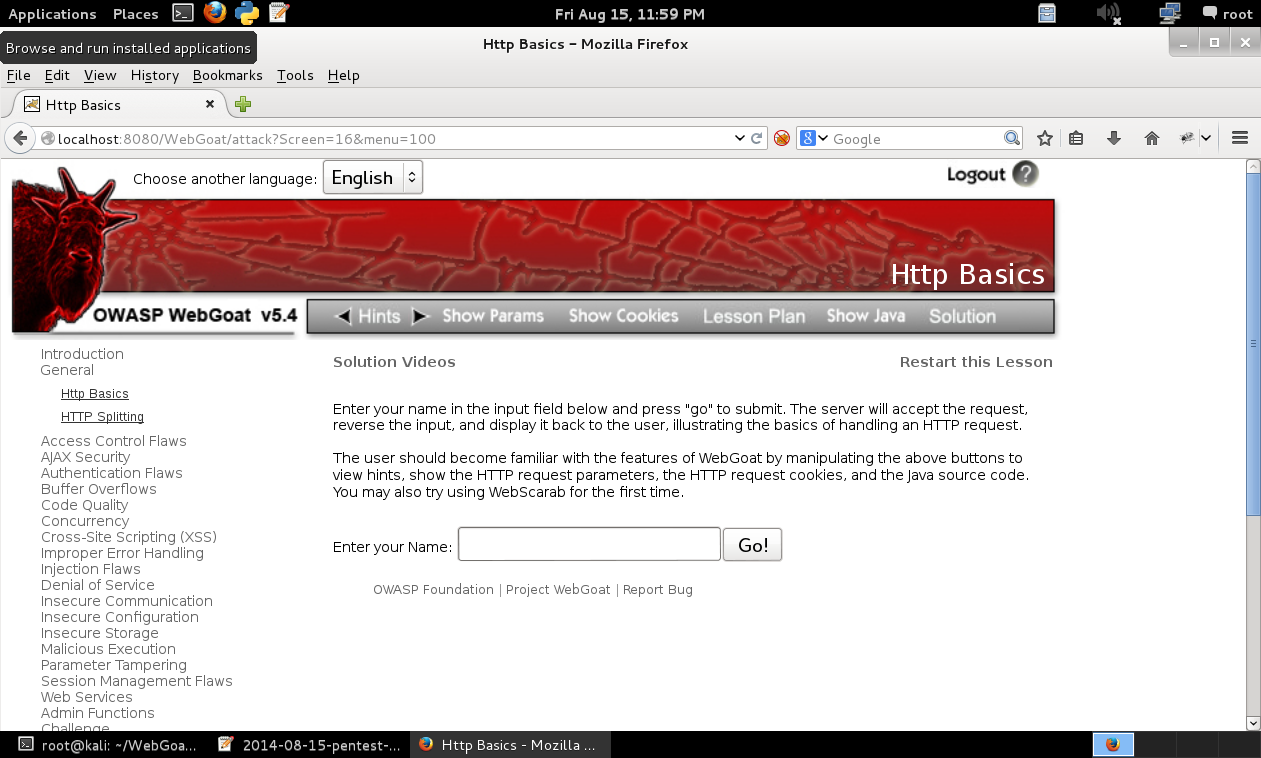
Concept / Topic To Teach:
This lesson presents the basics for understanding the transfer of data between the browser and the web application.
How HTTP works:
All HTTP transactions follow the same general format. Each client request and server response has three parts: the request or response line, a header section, and the entity body. The client initiates a transaction as follows:
The client contacts the server and sends a document request
GET /index.html?param=value HTTP/1.0
Next, the client sends optional header information to inform the server of its configuration and the document formats it will accept.
User-Agent: Mozilla/4.06 Accept: image/gif,image/jpeg, /
After sending the request and headers, the client may send additional data. This data is mostly used by CGI programs using the POST method.
My solution
Well, nothing fancy here. Just enter something in the text box. This is just a warmup.
HTTP Splitting
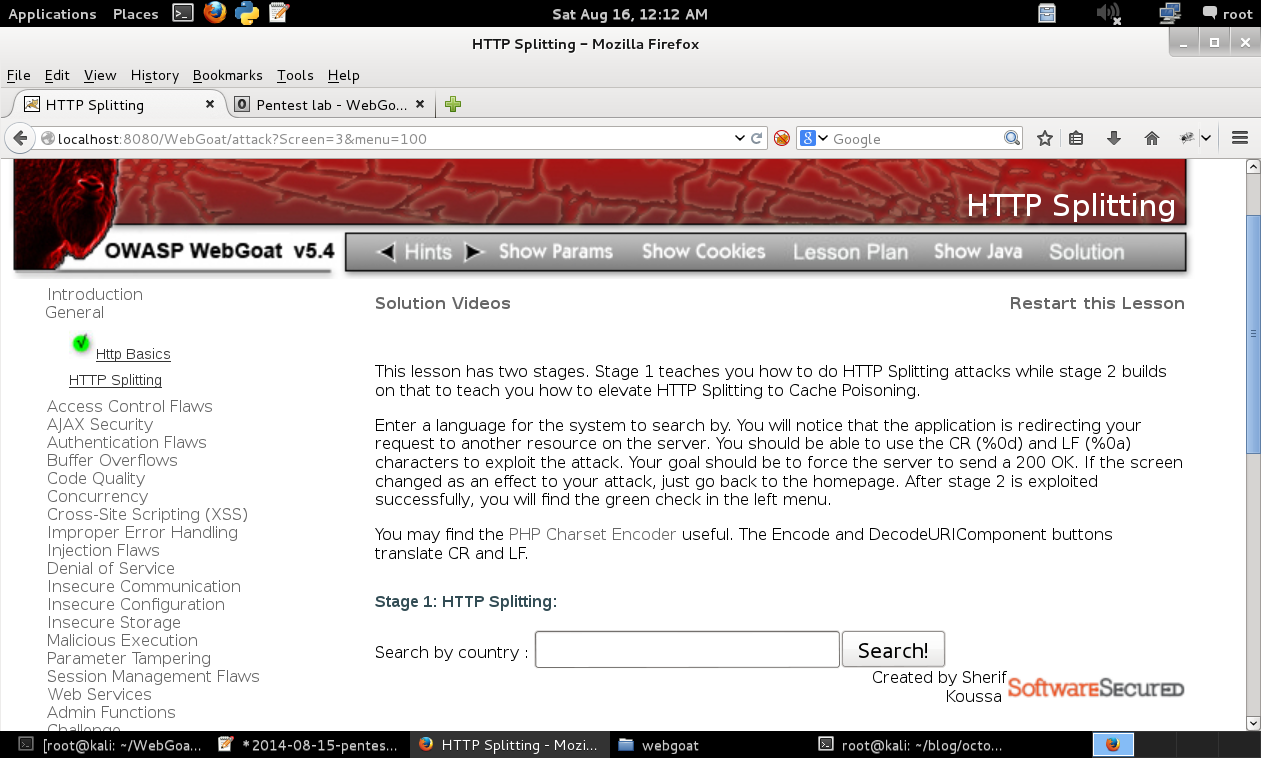
Concept / Topic To Teach:
This lesson teaches how to perform HTTP Splitting attacks.
How the attack works:
The attacker passes malicious code to the web server together with normal input. A victim application will not be checking for CR (carriage return, also given by %0d or \r) and LF (line feed, also given by %0a or \n) characters. These characters not only give attackers control of the remaining headers and body of the response the application intends to send, but they also allow them to create additional responses entirely under their control.
The effect of an HTTP Splitting attack is maximized when accompanied with a Cache Poisoning. The goal of Cache Poisoning attack is to poison the cache of the victim by fooling the cache into believing that the page hijacked using the HTTP splitting is an authentic version of the server’s copy.
The attack works by using the HTTP Splitting attack plus adding the Last-Modified: header and setting it to a future date. This forces the browser to send an incorrect If-Modified-Since request header on future requests. Because of this, the server will always report that the (poisoned) page has not changed, and the victim’s browser will continue to display the attacked version of the page.
A sample of a 304 response is:
HTTP/1.1 304 Not Modified Date: Fri, 30 Dec 2005 17:32:47 GMT
My solution
HTTP response splitting occurs when:
- Data enters a web application through an untrusted source, most frequently an HTTP request.
- The data is included in an HTTP response header sent to a web user without being validated for malicious characters.
HTTP response splitting is a means to an end, not an end in itself. At its root, the attack is straightforward: an attacker passes malicious data to a vulnerable application, and the application includes the data in an HTTP response header.
To mount a successful exploit, the application must allow input that contains CR (carriage return, also given by %0d or \r) and LF (line feed, also given by %0a or \n)characters into the header AND the underlying platform must be vulnerable to the injection of such characters. These characters not only give attackers control of the remaining headers and body of the response the application intends to send, but also allow them to create additional responses entirely under their control.
I entered en%0a in the box and looked at the response headers, which look like this:
HTTP/1.1 302 Moved Temporarily
Server: Apache-Coyote/1.1
Location: http://localhost:8080/WebGoat/attack?Screen=3&menu=100&fromRedirect=yes&language=en%0a
Content-Type: text/html;charset=ISO-8859-1
Content-Length: 0
Date: Fri, 15 Aug 2014 22:01:57 GMT
There is no input sanitization. Note the Content-Length: 0 header, which signals the end of the first request. After this header, I can add arbitrary headers. For stage 1, it looks like this:
1 2 3 4 5 6 | |
Just typing the headers in the box won’t work for the attack, you have to URL encode it. The encoded version is:
Content-Length%3A+0%0D%0A%0D%0AHTTP%2F1.1+200+OK%0D%0AContent-Type%3A+text%2Fhtml%0D%0AContent-Length%3A+50%0D%0A%3Chtml%3E%3Cbody%3EStage+1+pwned%21%3C%2Fbody%3E%3C%2Fhtml%3E.
That concludes the first part of the attack.
The impact of a maliciously constructed response can be magnified if it is cached either by a web cache used by multiple users or even the browser cache of a single user. If a response is cached in a shared web cache, such as those commonly found in proxy servers, then all users of that cache will continue to receive the malicious content until the cache entry is purged. Similarly, if the response is cached in the browser of an individual user, then that user will continue to receive the malicious content until the cache entry is purged, although only the user of the local browser instance will be affected.
To successfully carry out such an attack, an attacker:
- Finds the vulnerable service code, which allows them to fill the HTTP header field with many headers.
- Forces the cache server to flush its actual cache content, which we want to be cached by the servers.
- Sends a specially crafted request, which will be stored in cache.
- Sends the next request. The previously injected content stored in cache will be the response to this request.
A Cache Poisoning attack is possible because of HTTP Response Splitting and flaws in the web application. It is crucial from the attacker’s point of view that the application allows for filling the header field with more than one header using CR (Carrige Return) and LF (Line Feed) characters.
For the next part, we have to modify the Last-Modified header and setting it to a date in the future, to force the browser to cache the malicious page.
1 2 3 4 5 6 7 | |
Again, URL encode it:
Content-Length%3A+0%0D%0A%0D%0AHTTP%2F1.1+200+OK%0D%0AContent-Type%3A+text%2Fhtml%0D%0ALast-Modified%3A+Mon%2C+01+Aug+3000+00%3A00%3A00+GMT%0D%0AContent-Length%3A+50%0D%0A%3Chtml%3E%3Cbody%3EStage+1+pwned%21%3C%2Fbody%3E%3C%2Fhtml%3E
And stage 2 is complete!
Access Control Flaws
Using an Access Control Matrix
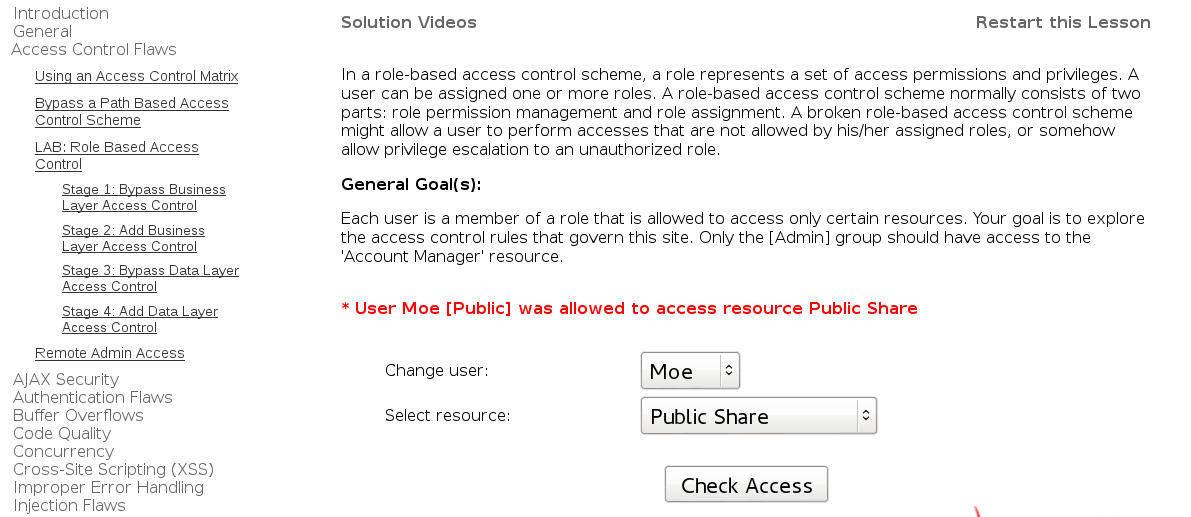
User Larry [User, Manager] was allowed to access resource Account Manager
Bypass a Path Based Access Control Scheme
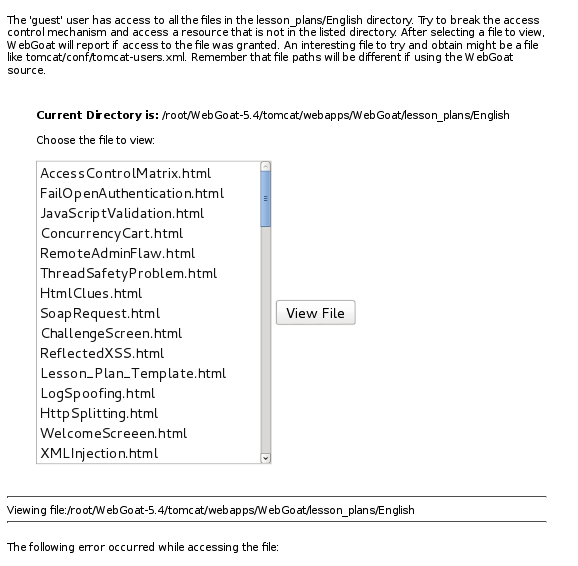
Concept / Topic To Teach:
In a path based access control scheme, an attacker can traverse a path by providing relative path information. Therefore an attacker can use relative paths to access files that normally are not directly accessible by anyone, or would otherwise be denied if requested directly.
My solution
Choose a file from the list and intercept the request. Then modify it to access a different file. I changed File=FailOpenAuthentication.html&SUBMIT=View+File to File=../../../../../../../../../etc/passwd&SUBMIT=View+File
LAB: Role Based Access Control
Concept / Topic To Teach:
In role-based access control scheme, a role represents a set of access permissions and privileges. A user can be assigned one or more roles. A role-based access control normally consists of two parts: role permission management and role assignment. A broken role-based access control scheme might allow a user to perform accesses that are not allowed by his/her assigned roles, or somehow obtain unauthorized roles.
General Goal(s):
Your goal is to explore the access control rules that govern this site. Each role has permission to certain resources (A-F). Each user is assigned one or more roles. Only the user with the [Admin] role should have access to the ‘F’ resources. In a successful attack, a who user doesn’t have the [Admin] role can access resource F.
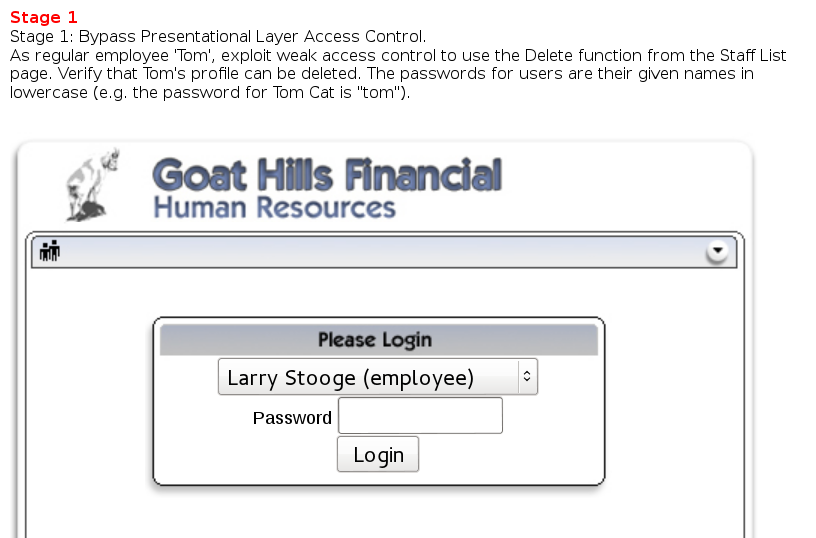
Stage 1 Bypass Business Layer Access Control.
I logged in as Tom and looked at the request headers when choosing the action ViewProfile. It looks like this: employee_id=105&action=ViewProfile. So, how might a delete profile action look like? I replayed the request with this very creative modification: employee_id=105&action=DeleteProfile. And that’s it for Stage 1!
Stage 2: Add Business Layer Access Control.
THIS LESSON ONLY WORKS WITH THE DEVELOPER VERSION OF WEBGOAT
Implement a fix to deny unauthorized access to the Delete function. To do this, you will have to alter the WebGoat code. Once you have done this, repeat stage 1 and verify that access to DeleteProfile functionality is properly denied.
I will skip the exercises that require the developer version, since I’m using the standard version.
Stage 3: Bypass Data Layer Access Control
As regular employee ‘Tom’, exploit weak access control to View another employee’s profile. Verify the access.
This time, modify the employee_id field to view a different profile: employee_id=111&action=ViewProfile
Stage 4: Add Data Layer Access Control
THIS LESSON ONLY WORKS WITH THE DEVELOPER VERSION OF WEBGOAT
Implement a fix to deny unauthorized access to this data. Once you have done this, repeat stage 3, and verify that access to other employee’s profiles is properly denied.
Remote Admin Access
Concept / Topic To Teach:
Applications will often have an administrative interface that allows privileged users access to functionality that normal users shouldn’t see. The application server will often have an admin interface as well.
General Goal(s):
Try to access the administrative interface for WebGoat. You may also try to access the administrative interface for Tomcat. The Tomcat admin interface can be accessed via a URL (/admin) and will not count towards the completion of this lesson.
If you look at Admin Functions in the menu, you should only see the Report Card function. Append &admin=true to the URL, and you will see more functions.
AJAX Security
Same Origin Policy Protection
Concept / Topic To Teach:
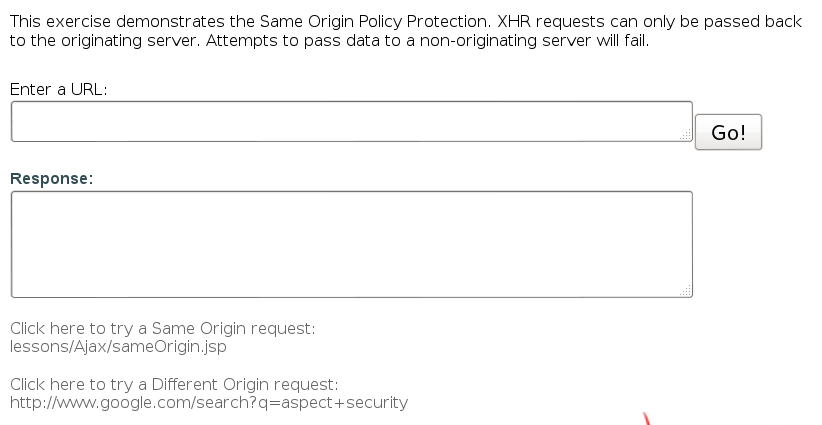
A key element of AJAX is the XMLHttpRequest (XHR), which allows javascript to make asynchronous calls from the client side to a server. However, as a security measure these requests may only be made to the server from which the client page originated.
Try the requests for both the same origin and different origin.
LAB: DOM-Based cross-site scripting
Concept / Topic To Teach:
The Document Object Model (DOM) presents an interesting problem from a security standpoint. It allows the content of a web page to be dynamically modified, but that can be abused by attackers during a malicious code injection. XSS, a type of malicious code injection, can occur when unvalidated user input is used directly to modify the content of a page on the client side.
General Goal(s):
For this exercise, your mission is to use this vulnerability to inject malicious code into the DOM. Then in the last stage, you will correct the flaws in the code to address the vulnerability.

The image location is at http://localhost:8080/WebGoat/images/logos/owasp.jpg. To deface the page, the injection looks like this:
1
| |
You will notice the Hello message, followed by the OWASP image.
STAGE 2
Now, try to create a JavaScript alert using the image tag
For this attack, we have to use the onerror event, which is triggered if an error occurs when loading an image. And of course, make sure there is no valid image so the error can happen:
1
| |
STAGE 3
Next, try to create a JavaScript alert using the IFRAME tag.
The iframe tag specifies an inline frame, which is used to embed another document within the current HTML document. The attack looks like this:
1
| |
STAGE 4
Use the following to create a fake login form:
1
| |
Now enter something in the box, and you will see it alerted back.
STAGE 5
Perform client-side HTML entity encoding to mitigate the DOM XSS vulnerability. A utility method is provided for you in escape.js.
Look in the page source for escape.js. Inside you will find the following function:
1 2 3 4 5 6 | |
In Firebug, look at DOMXSS.js. We have to modify this function:
1 2 3 4 5 | |
to use the escapeHTML function on the name parameter:
1
| |
To make the modification, I edited the Javascript file, located in my WebGoat directory, at tomcat/webapps/WebGoat/javascript
LAB: Client Side Filtering
Concept / Topic To Teach: It is always a good practice to send to the client only information which they are supposed to have access to. In this lesson, too much information is being sent to the client, creating a serious access control problem.
General Goal(s): For this exercise, your mission is exploit the extraneous information being returned by the server to discover information to which you should not have access.
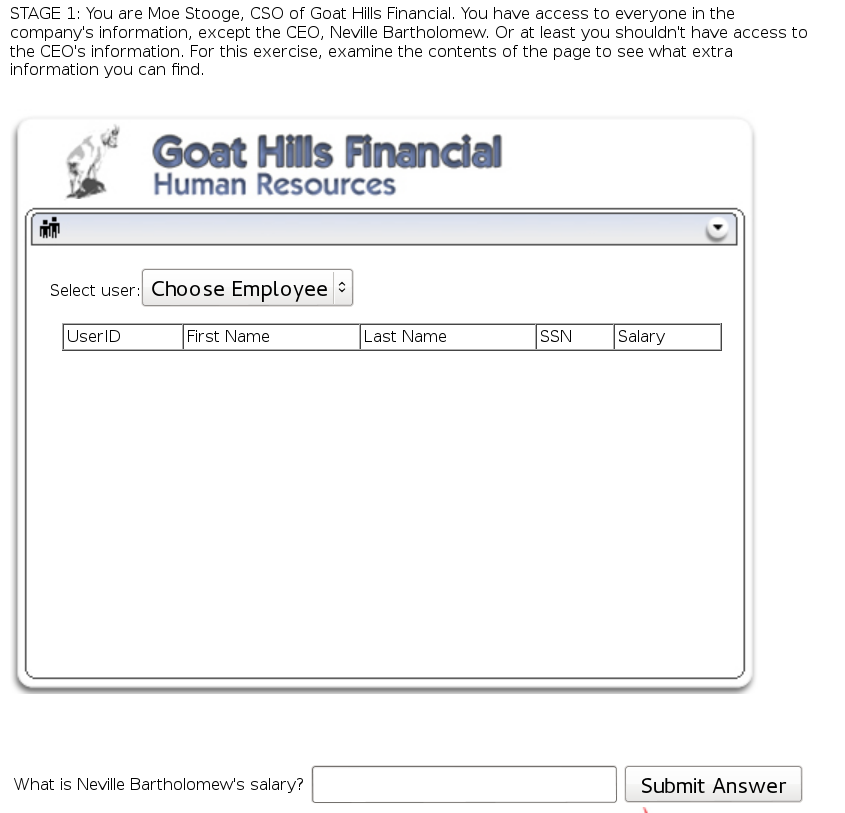
Inspect the source with Firebug, and you will notice a hidden table called hiddenEmployeeRecords. Look at the last id (112), and you will find out Bartholomew’s salary is 450000.
STAGE 2:
Now, fix the problem. Modify the server to only return results that Moe Stooge is allowed to see.
Again, this will require the modification of a file. Look in tomcat/webapps/WebGoat/lessons/Ajax. In the employees.xml file, every employee has a Managers property, that shows which manager should have access over that employee’s records. Looking at Neville Bartholomew’s profile, we see only he can access his information:
1 2 3 4 5 6 7 8 9 10 11 12 13 14 15 16 17 18 19 | |
Next, look at clientSideFiltering.jsp. I am not proficient with XPath, but here is the relevant bit:
1 2 3 4 5 6 7 8 9 | |
We have to change it so the information returned corresponds with the access rights that only managers should have over specific employee records. The filter looks like this:
1 2 3 4 5 | |
If I understand it right, this filter ensures that information is returned only if the user id is present in the Manager node. For example, in Bartholomew’s case, it should enforce the fact that only user id 112 can access his records. In other words, only Bartholomew himself can view his information.
For this, I looked at the solution provided by WebGoat, while searching some more about XPath syntax.
DOM Injection
Concept / Topic To Teach: How to perform DOM injection attacks.
How the attack works: Some applications, especially the ones that use AJAX, manipulate and update the DOM directly using javascript, DHTML and eval() methods. An attacker may take advantage of that by intercepting the reply and trying to inject some javascript commands to exploit the vulnerabilities.
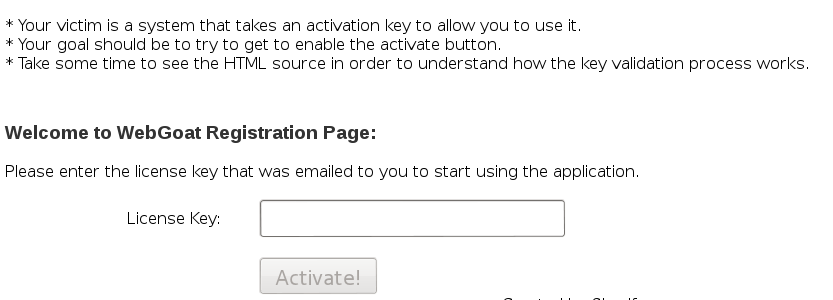
In Firebug, I just changed the Activate button below:
1
| |
to “enabled”, then clicked it.
XML Injection
Concept / Topic To Teach: This lesson teaches how to perform XML Injection attacks.
How the attack works: AJAX applications use XML to exchange information with the server. This XML can be easily intercepted and altered by a malicious attacker.

When you enter your account id, you will see the rewards that you can claim:
1 2 3 4 5 6 7 | |
This exercise requires a proxy, so I will use WebScarab to capture the requests and responses. The response from the server contains the following:
1 2 3 4 5 | |
This means it’s only a matter of adding the other rewards to the response, so it becomes this:
1 2 3 4 5 6 7 | |
Do that in WebScarab a couple of times and you will see them available on the page. I took the laptop!
JSON Injection
Concept / Topic To Teach: This lesson teaches how to perform JSON Injection Attacks.
How the attack works: JavaScript Object Notation (JSON) is a simple and effective lightweight data exchange format. JSON can be in a lot of forms such as arrays, lists, hashtables and other data structures. JSON is widely used in AJAX and Web2.0 applications and is favored by programmers over XML because of its ease of use and speed. However, JSON, like XML, is prone to Injection attacks. A malicious attacker can inject the reply from the server and inject some arbitrary values in there.

Intercept the response and modify the no stops flight in the following JSON to a lower price:
1 2 3 4 5 6 7 8 | |
Then selecy your now very cheap flight and you’re done.
Silent Transactions Attacks
Concept / Topic To Teach: This lesson teaches how to perform silent transactions attacks.
How the attack works: Any system that silently processes transactions using a single submission is dangerous to the client. For example, if a normal web application allows a simple URL submission, a preset session attack will allow the attacker to complete a transaction without the user’s authorization. In Ajax, it gets worse: the transaction is silent; it happens with no user feedback on the page, so an injected attack script may be able to steal money from the client without authorization.
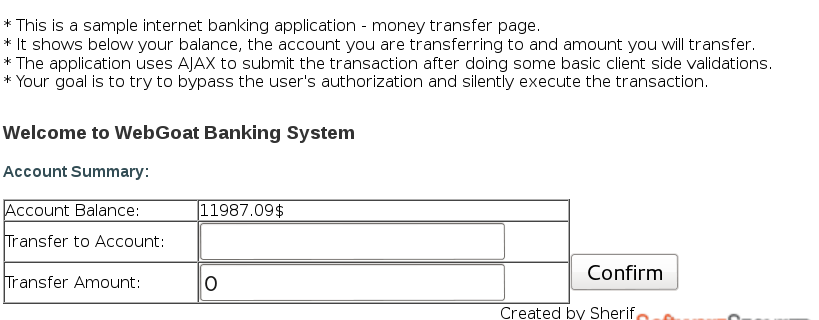
Find the following Javascript code in the source:
1 2 3 4 5 6 7 8 9 10 11 12 13 14 15 16 17 18 19 20 21 22 23 24 25 26 27 28 29 30 31 32 33 34 35 36 37 38 39 40 41 42 43 | |
The function processData performs some validation, such as correct account number, valid amount and balance. If all is well, it calls submitData, which is the function that does the transaction. The following line is the key to performing the attack:
1
| |
Then all we need to do is construct a URL like that with our chosen parameters:
Another way would be to use Javascript in the browser to call the function submitData directly with arbitrary values:
1
| |
In my Firefox version, I couldn’t use Javascript from the URL bar, so I used Scratchpad instead from the Web Developer tools.
Dangerous Use of Eval
Concept / Topic To Teach: It is always a good practice to validate all input on the server side. XSS can occur when unvalidated user input is reflected directly into an HTTP response. In this lesson, unvalidated user-supplied data is used in conjunction with a Javascript eval() call. In a reflected XSS attack, an attacker can craft a URL with the attack script and store it on another website, email it, or otherwise trick a victim into clicking on it.

At first I was stuck because I couldn’t quite grasp what the code was doing and where was the vulnerability, so I looked at the solution and worked backwards from there, and it became clearer, or at least I think it did.
The first thing I did was look at the eval.js code. And below is the important part.
1 2 3 4 5 6 7 8 9 10 11 12 13 14 15 16 17 18 19 | |
And in the eval.jsp file:
1 2 3 4 5 6 7 8 9 10 11 12 13 14 15 16 17 | |
First, some clarification to help understand the code:
The XMLHttpRequest object is used to exchange data with a server behind the scenes, and it is heavily used in AJAX programming
responseText is a property of the XMLHttpRequest object that returns the body of the server’s response as a string.
The indexOf() method returns the position of the first occurrence of a specified value in a string. This method returns -1 if the value to search for never occurs. Its syntax is
string.indexOf(searchvalue,start). The second parameter is optional, in case you want to give a position from where to start the search.field1 refers to the box with the 3 digit access code
In light of this information, let’s look again at this code:
1
| |
So, this looks in field1, which is the access code, for the occurrence of ‘);, the occurrence of the string “alert” and the occurrence of “document.cookie”. And we know what we have to use the vulnerable field to alert the cookie. First, let’s see how the value is encapsulated. I passed the value of 12, which wouldn’t meet the 3 digit requirement, and this is the popup that I got in return: Whoops: You entered an incorrect access code of “12”
At first, I was like, yeah I got it, and did this:
‘);alert(document.cookie);
It didn’t work, and I traced the answer of why to this line:
1
| |
This is the alert that we’ll have to exploit in order to alert the cookie. I will remove the escaping backslashes for a better visualization below. With the dummy value 12, it looks like this:
1
| |
With the failed injection attempt, it looks like this:
1
| |
There is a stray “) at the end that is not closed off, breaking the query. To fix that, I adjusted it to:
‘);alert(document.cookie);(’
Now the injection looks like this:
1
| |
Breaking it up into pieces:
alert(‘Whoops: You entered an incorrect access code of “” 12’);
alert(document.cookie);
(‘ “”’)
Now everything is closed nicely, and the injection succeeds. After the first popup with the Whoops: You entered an incorrect access code of “12, you get the second alert with the cookie.
This ended up as a very long explanation, and I hope I got it right. Looking at the solution initially, I had no idea why it worked, but after poring over the code, it became clearer. And all this is possible because the attacker controlled string is passed directly to the eval() function, with no sanitization taking place.
Insecure Client Storage
Concept / Topic To Teach: It is always a good practice to validate all input on the server side. Leaving the mechanism for validation on the client side leaves it vulnerable to reverse engineering. Remember, anything on the client side should not be considered a secret.

Look inside clientSideValidation.js for the following:
1 2 3 4 5 6 7 8 9 10 11 12 13 14 15 16 17 18 19 20 21 22 23 24 25 26 27 28 29 30 31 32 33 34 35 36 37 38 39 40 41 42 43 | |
The coupons are encrypted with a Caesar cipher, but we don’t have to manually reverse it. I called the decrypt function on one of the coupon values to receive the decrypted result:
1
| |
That gave the result PLATINUM.
STAGE 2: Now, try to get your entire order for free.
Hint: Use Firebug to remove the “readonly” attribute from the input next to “The total charged to your credit card:” and set the value to 0.
Just follow the hit, select the element with Firebug, delete the readonly attribute, and set the price to 0. Then purchase stuff for free!
Authentication Flaws
Password Strength
Concept / Topic To Teach: Accounts are only as secure as their passwords. Most users have the same weak password everywhere. If you want to protect them against brute-force-attacks, your application should have good requirements for passwords. The password should contain lower case letters, capitals and numbers. The longer the password, the better.
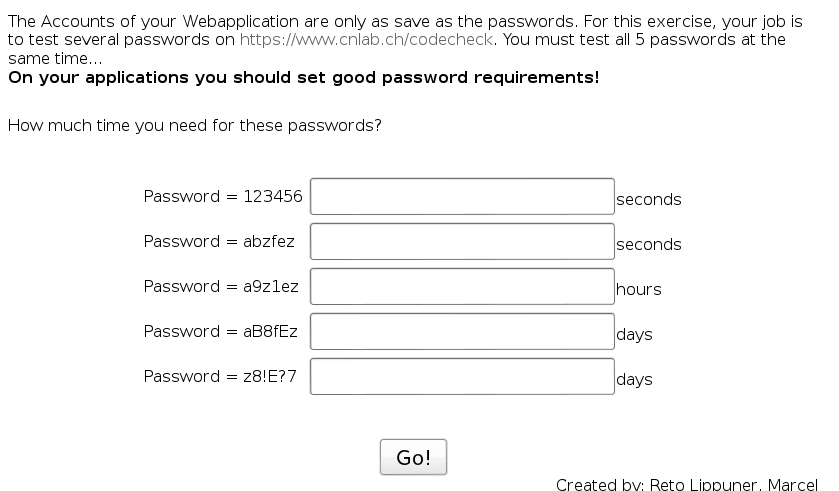
The site required by the lesson was no longer available. I tried other similar sites, but none gave the values required to pass the lesson. so you can just copy them from the solution. I skipped it.
Forgot Password
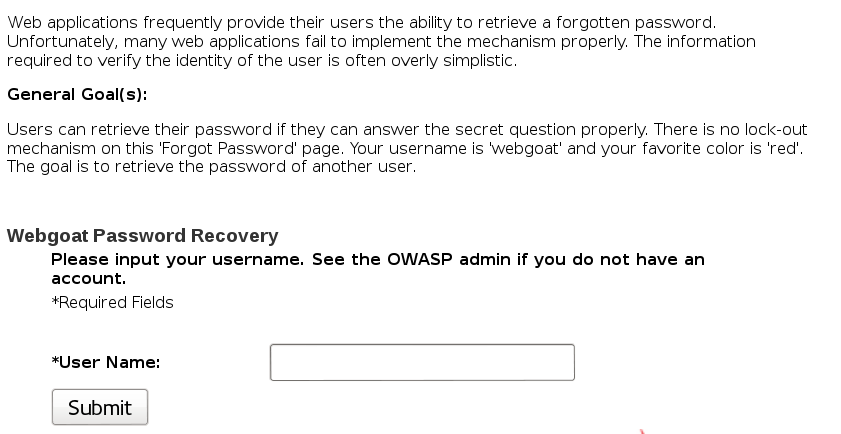
This was a matter of guessing. When giving a username, you are asked a secret question of what is your favorite color. I tried a couple of guesses for the admin user, until I stumbled upon the correct answer, which is green. Then you are presented with the user’s password, and looking at the admin password, it would have taken lifetimes to crack it.
Basic Authentication
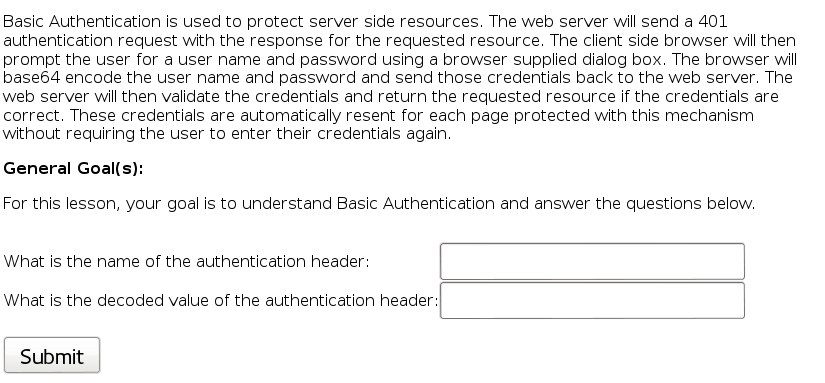
Click submit and intercept the request. You will see the following header: Authorization: Basic Z3Vlc3Q6Z3Vlc3Q=. Decode the Base 64 data for the credentials guest:guest. You will now see a new message:
“Congratulations, you have figured out the mechanics of basic authentication. – Now you must try to make WebGoat reauthenticate you as: – username: basic – password: basic. Use the Basic Authentication Menu to start at login page.”
“Use the hints! One at a time…”
I trapped the request and looked for this: header=Authorization&value=guest%3Aguest&SUBMIT=Submit. But even when I modified it to basic, it didn’t work. It turns out, you have to make the web application present you with a login popup like when you first start it. To do that, I deleted the JSESSIONID cookie. But this also wasn’t enough. I got the message:
You’re really close! Changing the session cookie caused the server to create a new session for you. This did not cause the server to reauthenticate you. When you figure out how to force the server to perform an authentication request, you have to authenticate as:
user name: basic password: basic
I had to also modify the Authorization header so that it wouldn’t be valid anymore. But that also got me a “you’re close message”:
You’re almost there! You’ve modified the Authorization header but you are still logged in as guest. Look at the request after you typed in the ‘basic’ user credentials and submitted the request. Remember the order of events that occur during Basic Authentication.
I had issues with completing this by invalidating the header and the cookie, and then entering the new credentials at popup. So I just restarted the application and logged in as basic from the beginning, after I cleared the saved passwords from the browser. Then the exercise was marked as finished.
Multi Level Login 1
Concept / Topic To Teach: A Multi Level Login should provide a strong authentication. This is archived by adding a second layer. After having logged in with your user name and password you are asked for a ‘Transaction Authentication Number’ (TAN). This is often used by online banking. You get a list with a lots of TANs generated only for you by the bank. Each TAN is used only once. Another method is to provide the TAN by SMS. This has the advantage that an attacker cannot get TANs provided for the user.
General Goal(s): In this Lesson you try to get around the strong authentication. You have to break into another account. The user name, password and a already used TAN is provided. You have to make sure the server accepts the TAN even it is already used.
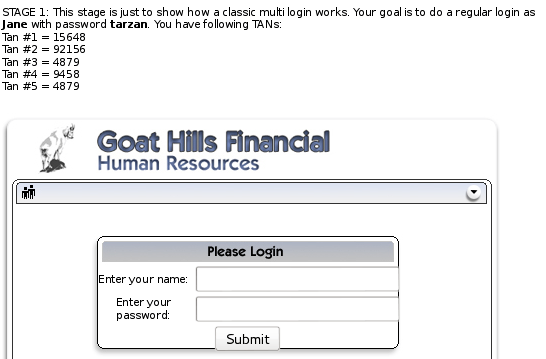
Log in and provide the first TAN. This is a demo stage.
STAGE 2: Now you are a hacker who already has stolen some information from Jane by a phishing mail. You have the password which is tarzan and the Tan #1 which is 15648
The problem is that the first tan is already used… try to break into the system anyway.
When you provide the TAN, look inside the request for this: hidden_tan=2&tan=15648+&Submit=Submit. Change the hidden tan to 1 to correspond to the TAN that you have.
Multi Level Login 2
General Goal(s): In this lesson you have to try to break into another account. You have an own account for WebGoat Financial but you want to log into another account only knowing the user name of the victim to attack.
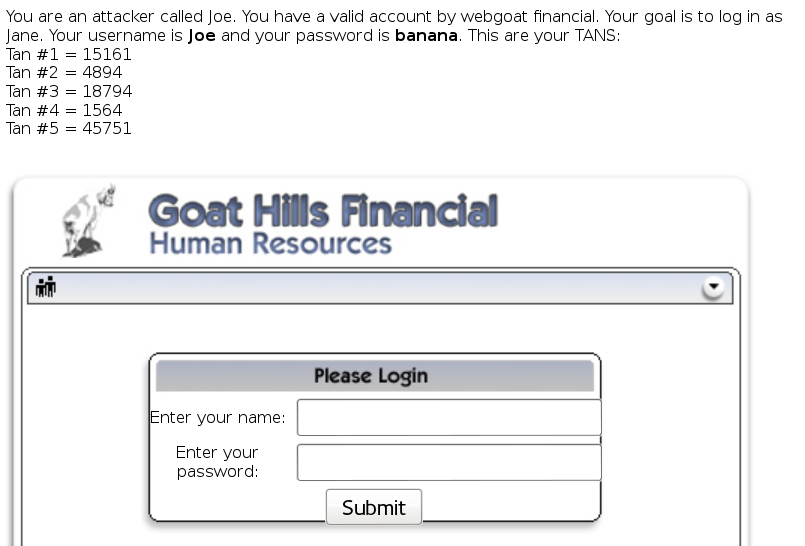
This time in the intercepted request, change the hidden user from Joe to Jane.
Buffer Overflows
Off-by-One Overflows
Concept / Topic To Teach: How to Exploit a Web Based “Off-by-One” Buffer Overflow.
How the attack works: Despite being more rare, buffer overflow vulnerabilities on the web occur when a tier of the application has insufficient memory allocated to deal with the data submitted by the user. Typically, such a tier would be written in C or a similar language. For the particular subset, namely, off-by-one overflows, this lesson focuses on the consequences of being able to overwrite the position for the trailing null byte. As a result, further information is returned back to the user, due to the fact that no null byte was found.
Lesson Goal(s):
- Understand how a buffer overflow vulnerability can be triggered on a web application.
- Understand what type of value lengths are likely to trigger a buffer overflow.
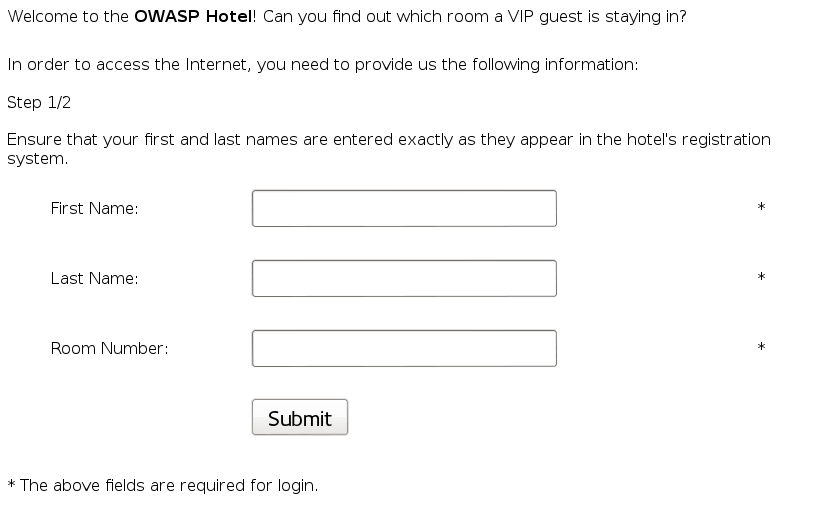
I tried every field with a 5000 character string generated by pattern_create.rb until I noticed a change in the source. The exploitable field is the room number field. Once I chose the price plan, I saw this message: “To complete the lesson, restart lesson and enter VIP first/last name”. So I knew I was on the right track, and in the source, I could see new goodies:
1 2 3 4 5 6 7 8 9 10 11 12 13 14 15 | |
Pick one of these to submit and complete the lesson.
Code Quality
Discover Clues in the HTML
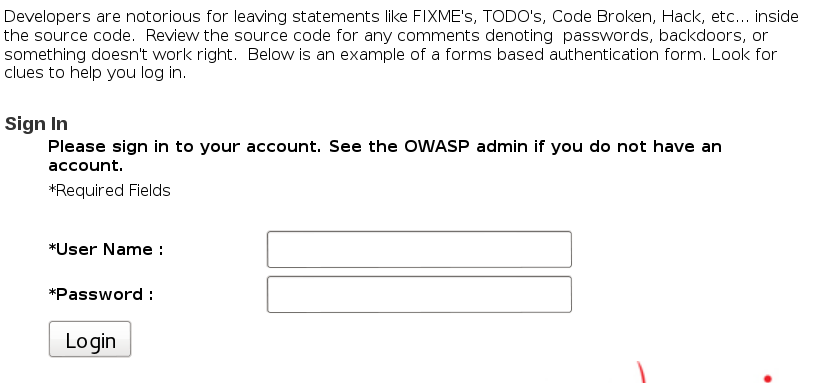
Find the HTML comments in the source: “FIXME admin:adminpw”, “Use Admin to regenerate database”
Concurrency
Thread Safety Problems
Concept / Topic To Teach: Web applications can handle many HTTP requests simultaneously. Developers often use variables that are not thread safe. Thread safety means that the fields of an object or class always maintain a valid state when used concurrently by multiple threads. It is often possible to exploit a concurrency bug by loading the same page as another user at the exact same time. Because all threads share the same method area, and the method area is where all class variables are stored, multiple threads can attempt to use the same class variables concurrently.

Try submitting the 2 user names from different browsers in very quick succession, and both browsers will return same user information.
Shopping Cart Concurrency Flaw

This time, the exploitation will be done in 2 tabs, instead of 2 browsers. Get 2 tabs on the same page.
On Tab1, select a low price item and add it to cart. Go all the way to confirming the purchase.
On Tab2, add to cart an expensive item.
On Tab1, confirm the purchase and you will see this: “Thank you for shopping! You have (illegally!) received a 90% discount. Police are on the way to your IP address.”
Cross-Site Scripting (XSS)
Phishing with XSS
Concept / Topic To Teach: It is always a good practice to validate all input on the server side. XSS can occur when unvalidated user input is used in an HTTP response. With the help of XSS you can do a Phishing Attack and add content to a page which looks official. It is very hard for a victim to determinate that the content is malicious.
General Goal(s): The user should be able to add a form asking for username and password. On submit the input should be sent to http://localhost/WebGoat/catcher?PROPERTY=yes &user=catchedUserName&password=catchedPasswordName
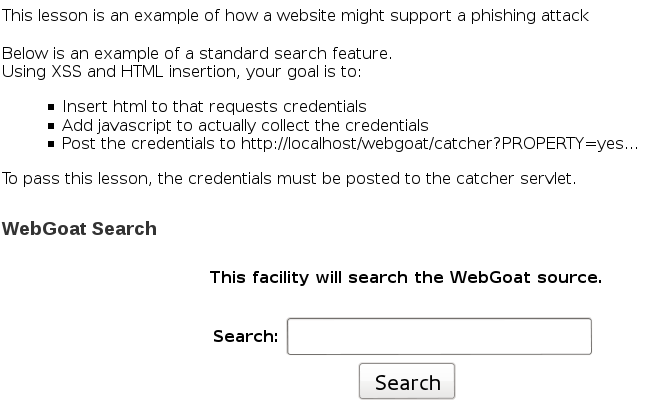
I made a fake form with a submit button that sends the credentials to the harverster when clicked. Here it is:
1 2 3 4 5 6 7 | |
LAB: Cross Site Scripting
Concept / Topic To Teach: It is always a good practice to scrub all inputs, especially those inputs that will later be used as parameters to OS commands, scripts, and database queries. It is particularly important for content that will be permanently stored somewhere. Users should not be able to create message content that could cause another user to load an undesirable page or undesirable content when the user’s message is retrieved. XSS can also occur when unvalidated user input is used in an HTTP response. In a reflected XSS attack, an attacker can craft a URL with the attack script and post it to another website, email it, or otherwise get a victim to click on it.
General Goal(s): For this exercise, you will perform stored and reflected XSS attacks. You will also implement code changes in the web application to defeat these attacks.
Stage 1: Execute a Stored Cross Site Scripting (XSS) attack.
As ‘Tom’, execute a Stored XSS attack against the Street field on the Edit Profile page. Verify that ‘Jerry’ is affected by the attack.
The passwords for the accounts are the lower-case versions of their given names (e.g. the password for Tom Cat is “tom”).
I edited Tom’s profile and added some XSS on the Street field:
1
| |
Whoever views Tom’s profile now will get the popup.
Stage 2: Block Stored XSS using Input Validation.
THIS LESSON ONLY WORKS WITH THE DEVELOPER VERSION OF WEBGOAT
Implement a fix to block the stored XSS before it can be written to the database. Repeat stage 1 as ‘Eric’ with ‘David’ as the manager. Verify that ‘David’ is not affected by the attack.
Skipped because I use the standard version.
Stage 3: Execute a previously Stored Cross Site Scripting (XSS) attack.
The ‘Bruce’ employee profile is pre-loaded with a stored XSS attack. Verify that ‘David’ is affected by the attack even though the fix from stage 2 is in place.
Well, there was no fix in my case, so all I had to do is view Bruce’s profile when logged in as David.
Stage 4: Block Stored XSS using Output Encoding.
THIS LESSON ONLY WORKS WITH THE DEVELOPER VERSION OF WEBGOAT
Implement a fix to block XSS after it is read from the database. Repeat stage 3. Verify that ‘David’ is not affected by Bruce’s profile attack.
Skipped.
Stage 5: Execute a Reflected XSS attack.
Use a vulnerability on the Search Staff page to craft a URL containing a reflected XSS attack. Verify that another employee using the link is affected by the attack.
It’s a simple XSS on the search page:
1
| |
Stage 6: Block Reflected XSS using Input Validation.
THIS LESSON ONLY WORKS WITH THE DEVELOPER VERSION OF WEBGOAT
Implement a fix to block this reflected XSS attack. Repeat step 5. Verify that the attack URL is no longer effective.
Skipped.
Stored XSS Attacks
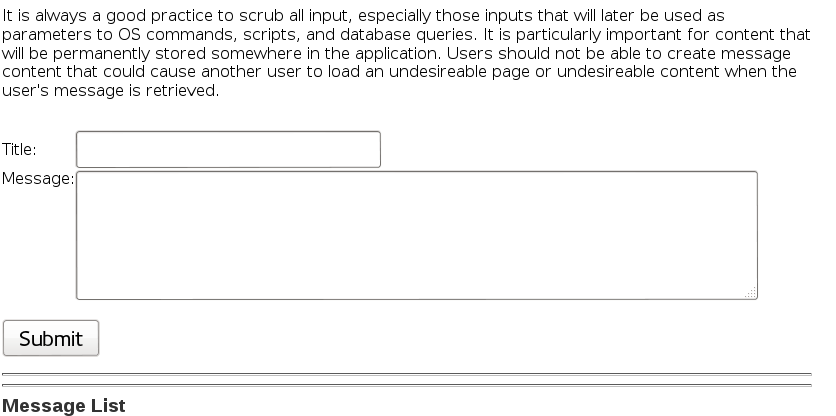
The XSS vulnerability is in the message box:
1
| |
Then click on the title in the message list and see it in action.
Reflected XSS Attacks
Concept / Topic To Teach: It is always a good practice to validate all input on the server side. XSS can occur when unvalidated user input is used in an HTTP response. In a reflected XSS attack, an attacker can craft a URL with the attack script and post it to another website, email it, or otherwise get a victim to click on it.
General Goal(s): For this exercise, your mission is to come up with some input containing a script. You have to try to get this page to reflect that input back to your browser, which will execute the script and do something bad.
The vulnerable field is the access code field:
1
| |
Then click Purchase.
Cross Site Request Forgery (CSRF)
Concept / Topic To Teach: This lesson teaches how to perform Cross Site Request Forgery (CSRF) attacks.
How the attack works: Cross-Site Request Forgery (CSRF/XSRF) is an attack that tricks the victim into loading a page that contains img links like the one below:
1
| |
When the victim’s browser attempts to render this page, it will issue a request to www.mybank.com to the transferFunds.do page with the specified parameters. The browser will think the link is to get an image, even though it actually is a funds transfer function. The request will include any cookies associated with the site. Therefore, if the user has authenticated to the site, and has either a permanent cookie or even a current session cookie, the site will have no way to distinguish this from a legitimate user request. In this way, the attacker can make the victim perform actions that they didn’t intend to, such as logout, purchase item, or any other function provided by the vulnerable website

To embed the image, use an attack like the following in the message box:
1 2 | |
Then click on the title and the funds transfer will happen behind the scenes.
CSRF Prompt By-Pass
Concept / Topic To Teach: This lesson teaches how to perform CSRF attacks that bypass user confirmation prompts.
How the attack works:
Cross-Site Request Forgery (CSRF/XSRF) is an attack that tricks the victim into loading a page that contains a ‘forged request’ to execute commands with the victim’s credentials. Prompting a user to confirm or cancel the command might sound like a solution, but can be bypassed if the prompt is scriptable. This lesson shows how to bypass such a prompt by issuing another forged request. This can also apply to a series of prompts such as a wizard or issuing multiple unrelated forged requests.
General Goal(s): Similar to the CSRF Lesson, your goal is to send an email to a newsgroup that contains multiple malicious requests: the first to transfer funds, and the second a request to confirm the prompt that the first request triggered. The URL should point to the CSRF lesson with an extra parameter “transferFunds=4000”, and “transferFunds=CONFIRM”. You can copy the shortcut from the left hand menu by right clicking on the left hand menu and choosing copy shortcut. Whoever receives this email and happens to be authenticated at that time will have his funds transferred. When you think the attack is successful, refresh the page and you will find the green check on the left hand side menu. Note that the “Screen” and “menu” GET variables will vary between WebGoat builds. Copying the menu link on the left will give you the current values.
The succession of steps is as follows:
Initiate the transfer with this URL: http://localhost:8080/WebGoat/attack?Screen=45&menu=900&Num=21&transferFunds=4000
Confirm the transfer by POSTing
transferFunds=CONFIRMto the URL http://localhost:8080/WebGoat/attack?Screen=45&menu=900
CSRF Token By-Pass
Concept / Topic To Teach: This lesson teaches how to perform CSRF attacks on sites that use tokens to mitigate CSRF attacks, but are vulnerable to CSS attacks.
How the attack works:
Cross-Site Request Forgery (CSRF/XSRF) is an attack that tricks the victim into loading a page that contains a ‘forged request’ to execute commands with the victim’s credentials.
Token-based request authentication mitigates these attacks. This technique inserts tokens into pages that issue requests. These tokens are required to complete a request, and help verify that requests are not scripted. CSRFGuard from OWASP uses this technique to help prevent CSRF attacks.
However, this technique can be by-passed if CSS vulnerabilities exist on the same site. Because of the same-origin browser policy, pages from the same domain can read content from other pages from the same domain.
General Goal(s): Similar to the CSRF Lesson, your goal is to send an email to a newsgroup that contains a malicious request to transfer funds. To successfully complete you need to obtain a valid request token. The page that presents the transfer funds form contains a valid request token. The URL for the transfer funds page is the same as this lesson with an extra parameter “transferFunds=main”. Load this page, read the token and append the token in a forged request to transferFunds. When you think the attack is successful, refresh the page and you will find the green check on the left hand side menu. Note that the “Screen” and “menu” GET variables will vary between WebGoat builds. Copying the menu link on the left will give you the current values.
First look at the source of http://localhost:8080/WebGoat/attack?Screen=2&menu=900&transferFunds=main for this line:
1
| |
So we know the value of a valid CSRF token. Then the URL to complete the transfer looks like this: http://localhost:8080/WebGoat/attack?Screen=2&menu=900&transferFunds=4000&CSRFToken=-2114619905
HTTPOnly Test
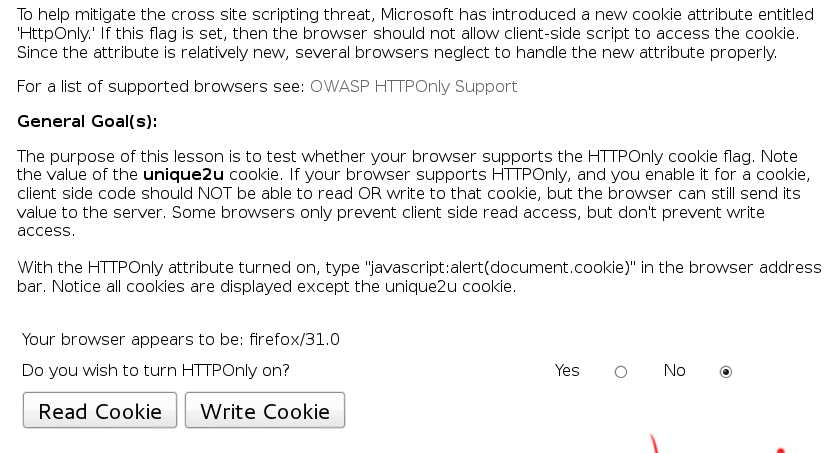
This is a demo showing the cookie being protected with the HTTPOnly flag.
Cross Site Tracing (XST) Attacks
We are back on the good old shopping cart page, with a twist: “Tomcat is configured to support the HTTP TRACE command. Your goal is to perform a Cross Site Tracing (XST) attack.”
Cross Site Tracing (XST) enables an attacker to steal the victim’s session cookie and possibly other authentication credentials transmitted in the header of the HTTP request when the victim’s browser communicates to destination system’s web server. The attacker first gets a malicious script to run in the victim’s browser that induces the browser to initiate an HTTP TRACE request to the web server. If the destination web server allows HTTP TRACE requests, it will proceed to return a response to the victim’s web browser that contains the original HTTP request in its body. The function of HTTP TRACE, as defined by the HTTP specification, is to echo the request that the web server receives from the client back to the client. Since the HTTP header of the original request had the victim’s session cookie in it, that session cookie can now be picked off the HTTP TRACE response and sent to the attackers’ malicious site. XST becomes relevant when direct access to the session cookie via the “document.cookie” object is disabled with the use of httpOnly attribute which ensures that the cookie can be transmitted in HTTP requests but cannot be accessed in other ways. Using SSL does not protect against XST.
If the system with which the victim is interacting is susceptible to XSS, an attacker can exploit that weakness directly to get his or her malicious script to issue an HTTP TRACE request to the destination system’s web server. In the absence of an XSS weakness on the site with which the victim is interacting, an attacker can get the script to come from the site that he controls and get it to execute in the victim’s browser (if he can trick the victim’s into visiting his malicious website or clicking on the link that he supplies). However, in that case, due to the same origin policy protection mechanism in the browser, the attackers’ malicious script cannot directly issue an HTTP TRACE request to the destination system’s web server because the malicious script did not originate at that domain. An attacker will then need to find a way to exploit another weakness that would enable him or her to get around the same origin policy protection.
We know from before that the vulnerable field is the access code one. I borrowed from the solution, but haven’t used an ActiveX object for the script:
1 2 3 4 5 6 7 8 | |
And some info on the methods used:
open() – initialize a request. The parameters used were the HTTP method, the URL and an optional boolean signifying whether or not to perform the operation asynchronously. If this value is false, the send()method does not return until the response is received.
send() – Sends the request. If the request is asynchronous (which is the default), this method returns as soon as the request is sent.
Improper Error Handling
Fail Open Authentication Scheme
Concept / Topic To Teach: This lesson presents the basics for understanding the “fail open” condition regarding authentication. The security term, “fail open” describes a behavior of a verification mechanism. This is when an error (i.e. unexpected exception) occurs during a verification method causing that method to evaluate to true. This is especially dangerous during login.
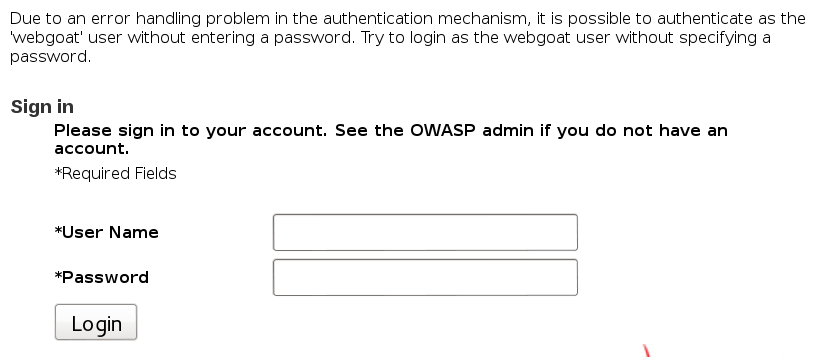
Just logging in with a blank password won’t cut it. From the hints and Java code, the correct way to exploit this is by removing the password parameter altogether. In WebScarab, the request looks like this: Username=webgoat&Password=&SUBMIT=Login. Get rid of the password and profit.
Injection Flaws
Command Injection
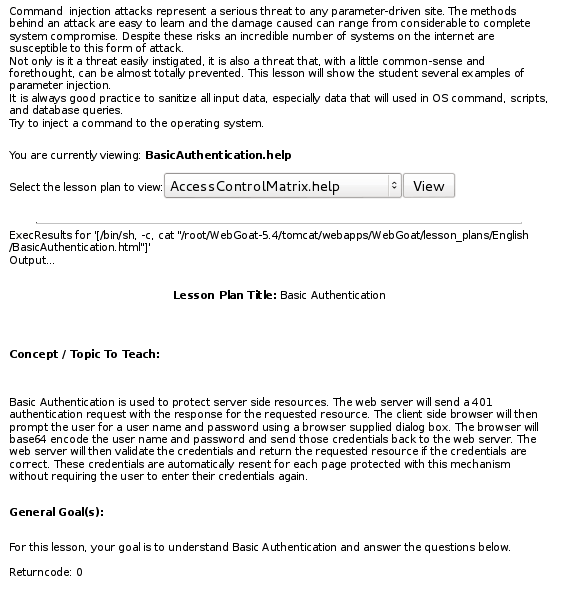
The server is retrieving the contents of the files by using the cat command. To insert a new command, I did this: HelpFile=AccessControlMatrix.help;whoami&SUBMIT=View, but the result wasn’t the one I expected:
1
| |
The reason is that the filename is enclosed within quotes, and the command I appended just got literally interpreted as part of the quoted filename. To escape that, first close the quotes, then inject the command(s): HelpFile=AccessControlMatrix.help";whoami;pwd". You also have to add quotes at the end, to close the stray quotes that you created when enclosing the filename.
Numeric SQL Injection
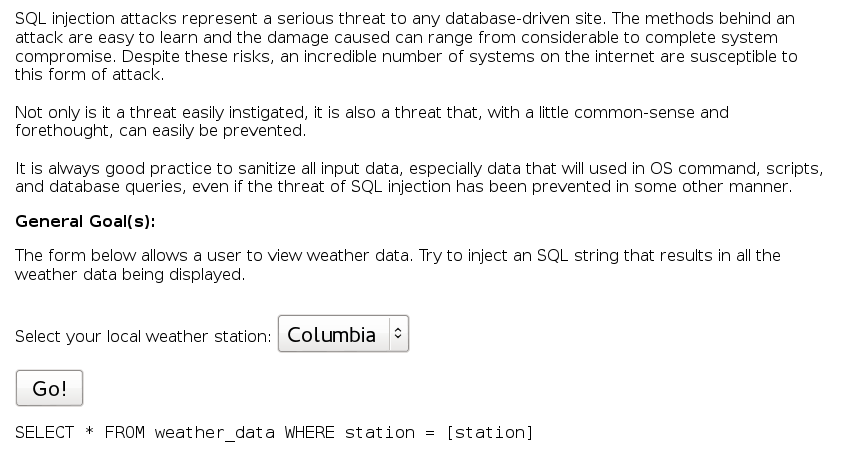
The injection is straightforward: station=101 or 1=1— &SUBMIT=Go%21
Log Spoofing
Concept / Topic To Teach: This lesson teaches attempts to fool the human eye.
How the attack works: The attack is based on fooling the human eye in log files. An attacker can erase his traces from the logs using this attack.
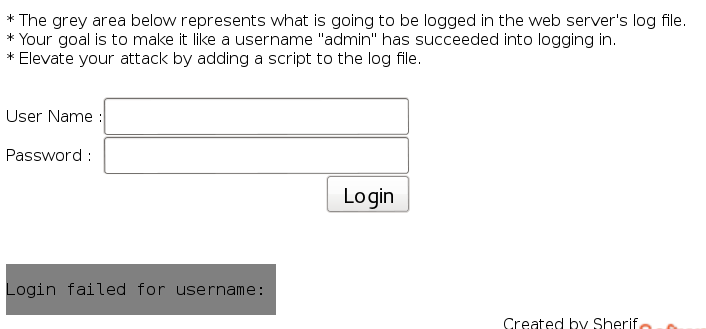
Whatever we input in the username box gets appended to the log file. To poison the log, do something like this:
1
| |
Using the CRLF attack, the log entries will now look like this:
1 2 | |
We can add a script as well:
1
| |
XPATH Injection
Concept / Topic To Teach: This lesson teaches how to perform XPath Injection attacks.
How the attack works: Similar to SQL Injection, XPATH Injection attacks occur when a web site uses user supplied information to query XML data. By sending intentionally malformed information into the web site, an attacker can find out how the XML data is structured or access data that they may not normally have access to. They may even be able to elevate their privileges on the web site if the xml data is being used for authentication (such as an xml based user file). Querying XML is done with XPath, a type of simple descriptive statement that allows the xml query to locate a piece of information. Like SQL you can specify certain attributes to find and patterns to match. When using XML for a web site it is common to accept some form of input on the query string to identify the content to locate and display on the page. This input must be sanitized to verify that it doesn’t mess up the XPath query and return the wrong data.
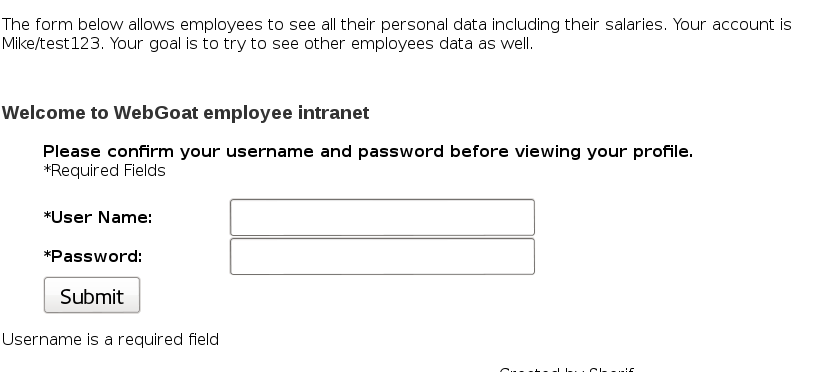
To understand this injection, let’s look at the following line:
1
| |
With our credentials, it looks like this:
1
| |
And the injection is as follows: ‘ or 'a’=‘a. Here’s how it looks in the code:
1
| |
In boolean logic, I think this boils down to:
False OR True AND False OR True
Since AND has higher precedence than OR, this becomes:
False OR False OR True = False OR True = True
String SQL Injection
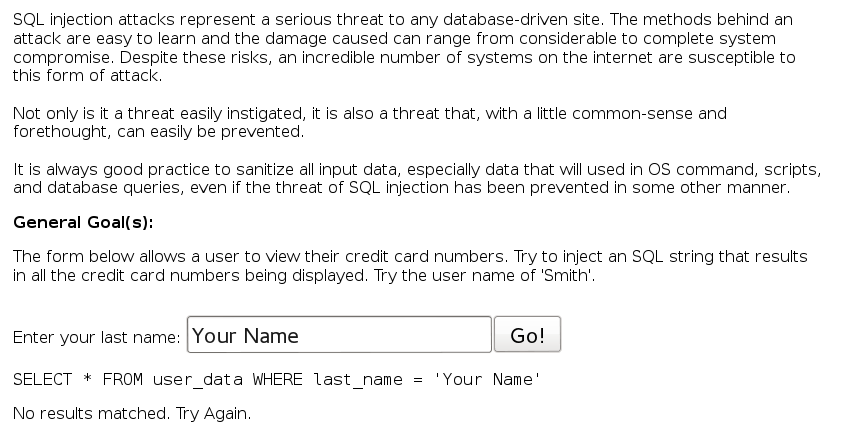
The injection is simple: ‘ or 1=1— . The resulting SQL query is:
1
| |
LAB: SQL Injection
Stage 1: Use String SQL Injection to bypass authentication. Use SQL injection to log in as the boss (‘Neville’) without using the correct password. Verify that Neville’s profile can be viewed and that all functions are available (including Search, Create, and Delete).
Before injecting, I had to use Firebug to increase the maxlength attribute of the password field.The injection is ‘ or 'a’=‘a
Stage 2: Block SQL Injection using a Parameterized Query.
THIS LESSON ONLY WORKS WITH THE DEVELOPER VERSION OF WEBGOAT
Implement a fix to block SQL injection into the fields in question on the Login page. Repeat stage 1. Verify that the attack is no longer effective.
I didn’t think ahead to get the dev version, so skipping.
Stage 3: Execute SQL Injection to bypass authorization.
As regular employee ‘Larry’, use SQL injection into a parameter of the View function (from the List Staff page) to view the profile of the boss (‘Neville’).
The request that needs to be exploited is this: employee_id=101&action=ViewProfile.
And the SQL injection is employee_id=101 or 1=1 order by salary desc.
The reason for inserting the order by clause is because there is only one returned result and that needs to be the boss. And the boss has the biggest salary, right? By ordering the salary in descending order (from highest to lowest), we ensure that the first result is the boss’ profile.
Stage 4: Block SQL Injection using a Parameterized Query.
THIS LESSON ONLY WORKS WITH THE DEVELOPER VERSION OF WEBGOAT
Implement a fix to block SQL injection into the relevant parameter. Repeat stage 3. Verify that access to Neville’s profile is properly blocked.
Skipped.
Modify Data with SQL Injection

Placing a quote in the box triggers an error: Unexpected end of command in statement [SELECT * FROM salaries WHERE userid = ‘]
To modify data, we have to construct an injection that will execute another query: jsmith';update salaries set salary = 50000 where userid=‘jsmith
The behind the scenes query is now:
1
| |
The UPDATE statement is used to update records in a table.
Syntax:
1 2 3 | |
Add Data with SQL Injection
This time, we have to add a record to the table. We can do it with this: jsmith';insert into salaries values(‘hacker’, 100000)—
And the query is:
1
| |
That pesky quote needed to be commented out.
The INSERT INTO statement is used to insert new records in a table.
Syntax:
1 2 | |
Database Backdoors
Concept / Topic To Teach: How to Create Database Back Door Attacks.
How the attack works: Databases are used usually as a backend for web applications. Also it is used as a media of storage. It can also be used as a place to store a malicious activity such as a trigger. A trigger is called by the database management system upon the execution of another database operation like insert, select, update or delete. An attacker for example can create a trigger that would set his email address instead of every new user’s email address.
General Goal(s): * Your goal should be to learn how you can exploit a vulnerable query to create a trigger. * You will not be able to actually create one in this lesson because the underlying database engine used with WebGoat doesn’t support triggers.

When you input your id, the query looks like this:
1
| |
The injection is: 101; update salaries set salary = 75000 where userid = ‘larry’
Now for stage 2:
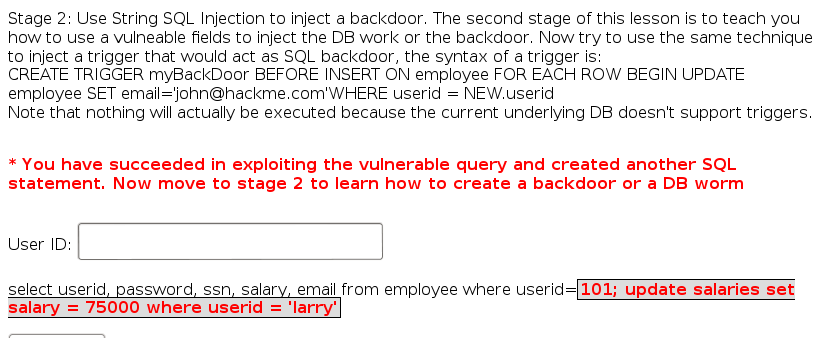
And the syntax for creating the trigger is:
1
| |
This creates a trigger that will be executed for each row before the insert operation and that will set the salary to the given value for the newly inserted userid.
Blind Numeric SQL Injection

The page works like this: if you enter a correct account, you get this message: Account number is valid. Else, you get this: Invalid account number.
We need to add another condition to the query and cycle through attempts until we hit the jackpot. Like ANDing the original query with a true/false condition:
1
| |
Repeating this a couple of times, I determine that the PIN is higher than 2000 but lower than 2500. I will show here how to use Burp Suite for finding the right value.
Start Burp and capture a normal request to the page
Send it to Intruder
In the Positions tab, keep only the relevant position (the account_number), and add a statement checking if the tested value is equal to the condition. It looks like this:
account_number=101 and 1=((SELECT pin FROM pins WHERE cc_number = ‘1111222233334444’)=§§)&SUBMIT=Go%21. The type of attack is the Sniper attack.In the Payloads tab, load a file with some values
In the Options tab, under Grep-Match, add strings to be matched in responses (the messages for valid and invalind account numbers. Don’t forget the dot at the end). And under Redirections, check to always follow redirections and to process cookies in redirections
Start the attack. Here’s an example of the results:

The correct PIN is 2364.
Blind String SQL Injection
The form below allows a user to enter an account number and determine if it is valid or not. Use this form to develop a true / false test check other entries in the database.
Reference Ascii Values: ‘A’ = 65 ‘Z’ = 90 ‘a’ = 97 ‘z’ = 122
The goal is to find the value of the field name in table pins for the row with the cc_number of 4321432143214321. The field is of type varchar, which is a string.
Put the discovered name in the form to pass the lesson. Only the discovered name should be put into the form field, paying close attention to the spelling and capitalization.
This is a variation of the previous attack. The difference is now we’re dealing with a string.
The way to perform this attack is to use the SUBSTRING method to check for a boolean condition:
SUBSTRING ( expression ,start , length )
1
| |
This will check if the first letter of the name is lower than the ASCII value of letter Z. After you determine the first letter, you can continue testing for the next:
1
| |
You can use BurpSuite like I did previously, to test for the letters. Something like: account_number=101 AND (SUBSTRING((SELECT name FROM pins WHERE cc_number=‘4321432143214321’), 1, 1) = ‘J’ )&SUBMIT=Go%21, then move to the next letter, and so on. The payload position should be between the quotes.
The name we’re looking for is Jill.
Denial of Service
Denial of Service from Multiple Logins
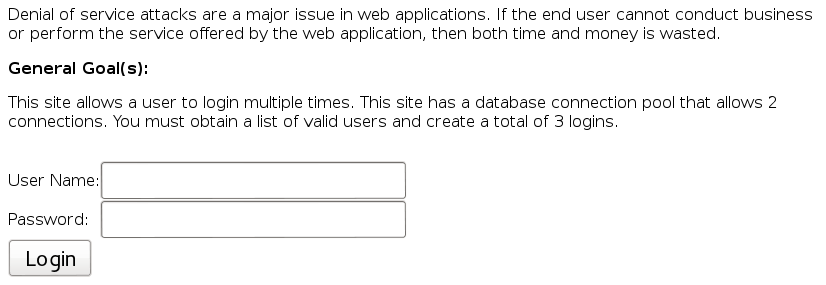
This means that, if we exceed the multiple logins treshold, which is 2, the application should choke. First let’s find out some user details:

Login 3 times to complete this lesson.
Insecure Communication
Insecure Login
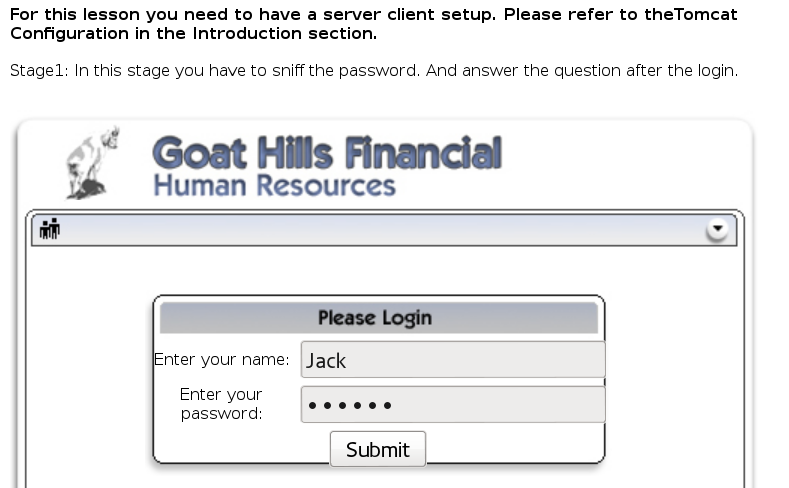
I started Wireshark and sniffed the the password. Here’s how it looks like:
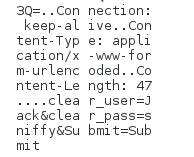
The password is sniffy.
Stage2: Now you have to change to a secure connection. The URL should start with https:// If your browser is complaining about the certificate just ignore it. Sniff again the traffic and answer the questions
This time, with the use of SSL, the password is no longer transmitted in plain text.
Insecure Configuration
Forced Browsing
Concept / Topic To Teach: How to Exploit Forced Browsing.
How the attack works: Forced browsing is a technique used by attackers to gain access to resources that are not referenced, but are nevertheless accessible. One technique is to manipulate the URL in the browser by deleting sections from the end until an unprotected directory is found
*Your goal should be to try to guess the URL for the “config” interface.
*The “config” URL is only available to the maintenance personnel.
*The application doesn’t check for horizontal privileges.
Can you try to force browse to the config page which should only be accessed by maintenance personnel?
The URL is http://localhost:8080/WebGoat/conf
Insecure Storage
Encoding Basics
This lesson will familiarize the user with different encoding schemes.
You can enter strings and see how they are encoded with different algorithms.
Malicious Execution
Malicious File Execution
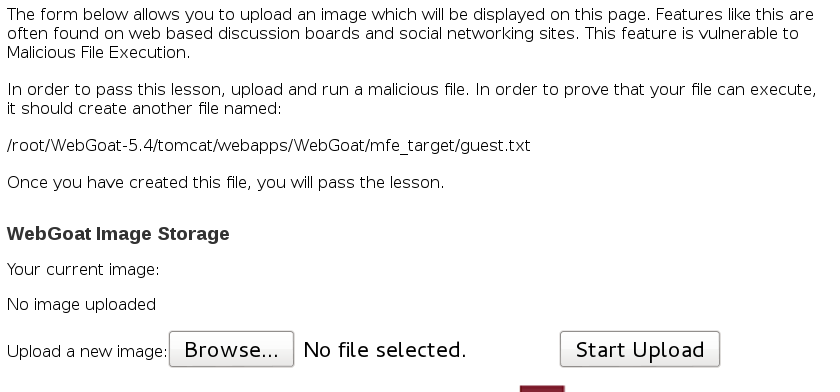
Upload an image. Then right-click it and select View Image Info (Firefox) to discover the upload path. The images get uploaded in the http://localhost:8080/WebGoat/uploads/ path
Armed with this knowledge, we can now upload a file containing code that creates the guest.txt file in the required location. Because of the underlying web application architecture, I had to use Java for this (hardly my choice for any coding). So I borrowed from the solution:
1 2 3 4 | |
I uploaded it as exe.jsp. Then I went to http://localhost:8080/WebGoat/uploads/exe.jsp. When you navigate to your uploaded file, you will see a blank page, but your code has executed. Refresh the lesson to complete it.
Parameter Tampering
Bypass HTML Field Restrictions

For this, I used a combination of Live HTTP Headers and Firebug. I used Firebug to enable the disabled field by delething this part: disabled=“”. For the rest, I just intercepted the request and added random numbers and characters (including in the Submit button).
Exploit Hidden Fields
Concept / Topic To Teach: Developers will use hidden fields for tracking, login, pricing, etc.. information on a loaded page. While this is a convenient and easy mechanism for the developer, they often don’t validate the information that is received from the hidden field. This lesson will teach the attacker to find and modify hidden fields to obtain a product for a price other than the price specified
General Goal(s): The user should be able to exploit a hidden field to obtain a product at an incorrect price. Try to purchase the HDTV for less than the purchase price, if you have not done so already.
This is another shopping cart functionality. Find this in the source:
1
| |
Edit it, and buy.
Exploit Unchecked Email
Concept / Topic To Teach: It is always a good practice to validate all inputs. Most sites allow non-authenticated users to send email to a ‘friend’. This is a great mechanism for spammers to send out email using your corporate mail server.

The first part of the attack is to add a script to the comment box. I entered a simple XSS alert:
1
| |
You will see this: The attack worked! Now try to attack another person than the admin.
For the second part, I intercepted the request with WebScarab and modified the mail address from the to field to an arbitrary address.
Bypass Client Side JavaScript Validation
Concept / Topic To Teach: Client-side validation should not be considered a secure means of validating parameters. These validations only help reduce the amount of server processing time for normal users who do not know the format of required input. Attackers can bypass these mechanisms easily in various ways. Any client-side validation should be duplicated on the server side. This will greatly reduce the likelihood of insecure parameter values being used in the application.
General Goal(s): For this exercise, the web site requires that you follow certain rules when you fill out a form. The user should be able to break those rules, and send the website input that it wasn’t expecting.
For this, I just used WebScarab to add some @ symbols in each field.
Session Management Flaws
Hijack a Session
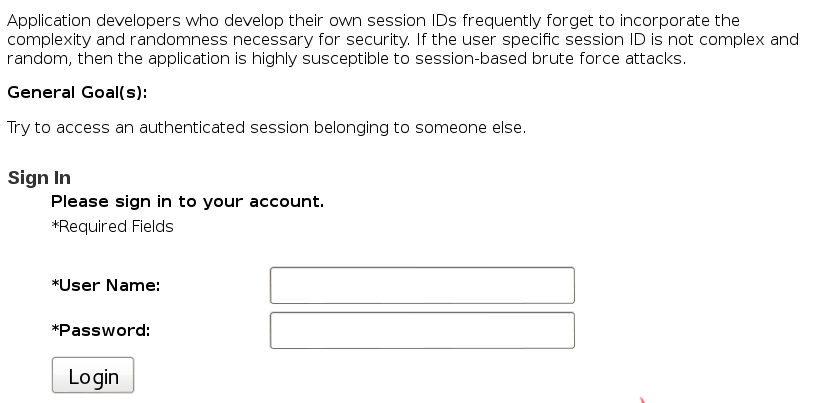
When trying to log in, we can see a session ID that is not present on successful login: WEAKID=10185-1409598474670. This changes with every login attempt. To get more information about how the session ID is constructed, I used WebScarab’s SessionID Analysis feature. From the Previous Requests list, I selected the POST request that had a 200 OK response (the one ending in WebGoat/attack). I tried to test it, and got the message that no session identifiers were found. I deleted the WEAKID cookie and tested again. This time I got a popup:
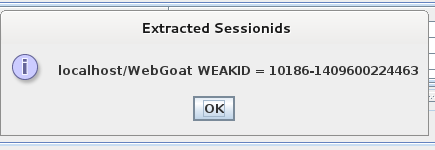
The next step is to collect some session IDs by selecting a number for samples and clicking Fetch. I used 50. Then, in the Analysis tab, select the WEAKID from the Session Identifier list. Here’s a sample screen:

The part before the dash seems to increase sequentially, but we can spot some missing sequences: after 10236 comes 10238. So the goal here is to find a valid session ID with one of these missing sessions.
Let’s look next at the part after the dash. Here too there is a pattern:
10187-1409601344499
10188-1409601344590
And so on. The bold part changes with each request, but in an incremental fashion. Look at the Difference tab. The values are really close to each other, except a few cases where there is a much higher value, sort of a double of the normal values. These are the session IDs that come after the missing IDs, which are the ones we want to use.

In this example, we want the ID starting with 10208, but we don’t know the part after the dash. But we know the previous and the next session ID values, so we can set boundaries:
10207-1409601346563
10208-1409601346???
10209-1409601346658
Our session ID is between 564 and 657. I wrote a Python script to bruteforce the value:
1 2 3 4 5 6 7 8 9 10 11 12 13 14 15 16 17 18 19 20 21 22 23 24 25 26 27 28 29 30 31 32 | |
The weak ID discovered by this script was 10208-1409601346610. I refreshed the page, and the lesson was complete.
Spoof an Authentication Cookie
Concept / Topic To Teach: Many applications will automatically log a user into their site if the right authentication cookie is specified. Some times the cookie values can be guessed if the algorithm for generating the cookie can be obtained. Some times the cookies are left on the client machine and can be stolen by exploiting another system vulnerability. Some times the cookies may be intercepted using Cross site scripting. This lesson tries to make the student aware of authentication cookies and presents the student with a way to defeat the cookie authentication method in this lesson.
General Goal(s): The user should be able to bypass the authentication check. Login using the webgoat/webgoat account to see what happens. You may also try aspect/aspect. When you understand the authentication cookie, try changing your identity to alice.
Logging in as webgoat, I see the following:
*Your identity has been remembered
Welcome, webgoat
You have been authenticated with PARAMETERS
And I now have an AuthCookie with the value 65432ubphcfx. If I log in as aspect, the value of the cookie is 65432udfqtb. So the differing bits are:
webgoat: ubphcfx
aspect: udfqtb
The first thing to notice is the value length corresponds to the length of the username. When trying to make further sense of it, you notice a pattern:
The letters in the username are reversed
Each letter is replaced with the next letter in the alphabet
And the example for aspect:
1 2 3 4 5 6 | |
So now we know how to craft a valid cookie for alice:
1 2 3 4 5 | |
All that’s left is to login as alice, intercept the request and add the correct value for the cookie: 65432fdjmb. We now see this:
Welcome, alice
You have been authenticated with COOKIE
Session Fixation
Concept / Topic To Teach: How to steal a session with a ‘Session Fixation’
How the attack works: A user is recognized by the server by an unique Session ID. If a user has logged in and is authorized he does not have to reauthorize when he revisits the application as the user is recognized by the Session ID. In some applications it is possible to deliver the Session ID in the Get-Request. Here is where the attack starts.
An attacker can send a hyperlink to a victim with a chosen Session ID. This can be done for example by a prepared mail which looks like an official mail from the application administrator. If the victim clicks on the link and logs in he is authorized by the Session ID the attacker has chosen. The attacker can visit the page with the same ID and is recognized as the victim and gets logged in without authorization.
General Goal(s): This lesson has several stages. You play the attacker but also the victim. After having done this lesson it should be understood how a Session Fixation in general works. It should be also understood that it is a bad idea to use the Get-Request for Session IDs.
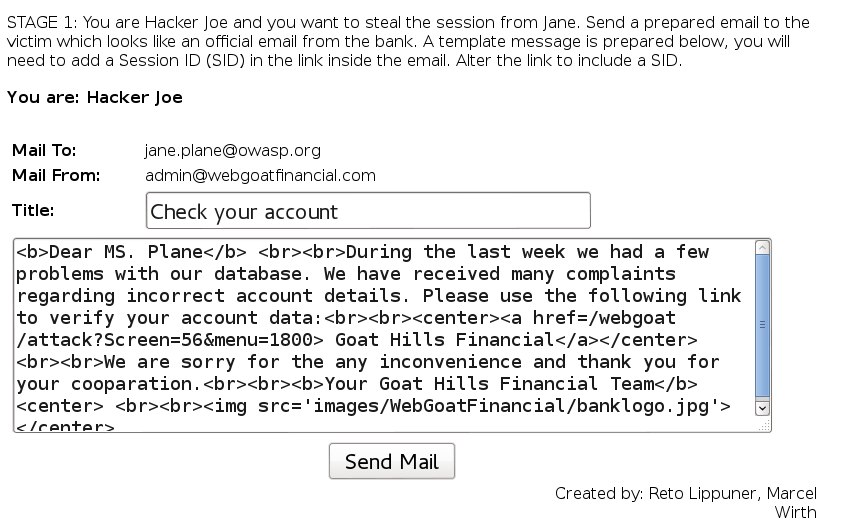
For this, I added the SID inside the link in the mail body:
1
| |

Just click on the link for this stage.
STAGE 3: The bank has asked you to verify your data. Log in to see if your details are correct. Your user name is Jane and your password is tarzan.
Just log in for this one.
STAGE 4: It is time to steal the session now. Use following link to reach Goat Hills Financial.
You are: Hacker Joe
Jane has logged into her account. Go and grab her session! Use Following link to reach the login screen of the bank:
http://localhost:8080/WebGoat/attack?Screen=56&menu=1800&SID=NOVALIDSESSION
On the login URL, replace the invalid SID with the one you used previously. You will now see Jane’s details.
Web Services
Create a SOAP Request
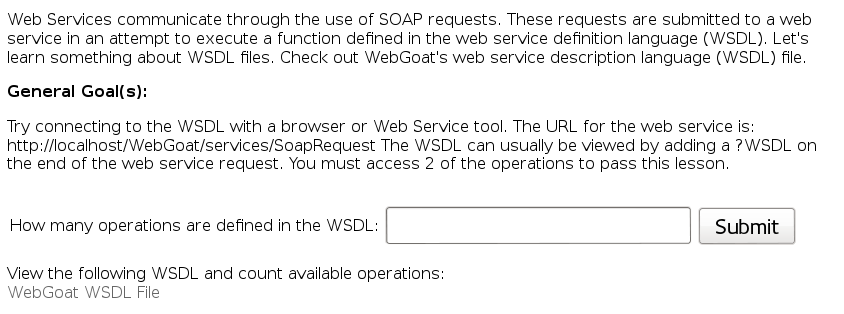
The answer is 4. Look for the operations under the <wsdl:portType name=“SoapRequest”> tag.
Stage 2 Now, what is the type of the (id) parameter in the “getFirstNameRequest” method: the answer is int. Chech for it here:
1 2 | |
Stage 3 Intercept the request and invoke any method by sending a valid SOAP request for a valid account.
You must access at least 2 of the methods to pass the lesson.
For this I used SoapUI. Start a new project and give it the wsdl URL:
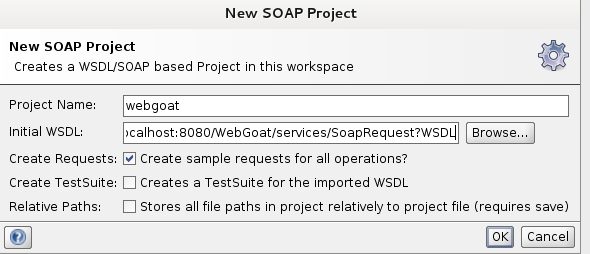
You will see the available operations under the project. Select one of them and copy the request that you will use in the proxy.
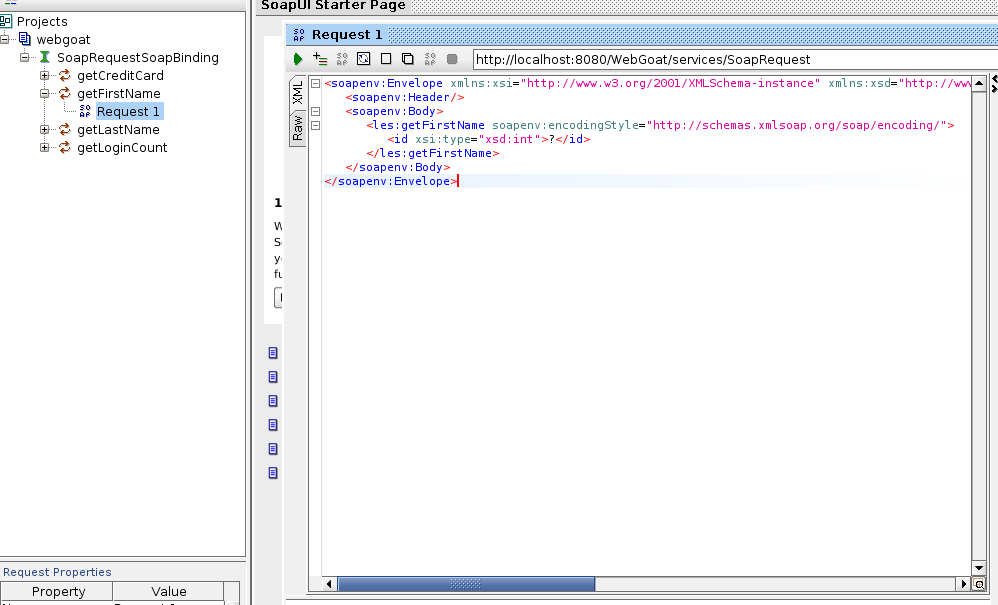
Replace the question mark with some value:
1
| |
Add the basic authentication credentials, then submit the request, and you will see the response in the right tab. The retrieved first name is Joe.

Repeat for the other methods. My second choice was the credit card number, and for id 101 it was 987654321.
WSDL Scanning
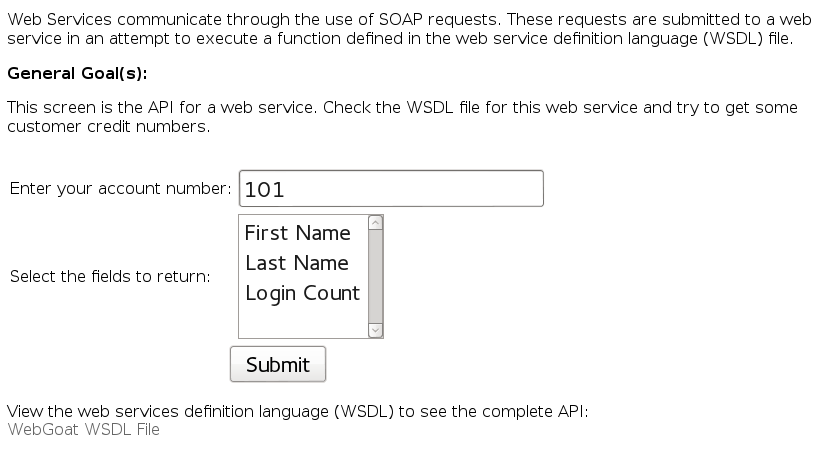
The objective here is to obtain some credit card numbers. Let’s look again at the WSDL file:
1
| |
We have a method for retrieving credit cards. All that’s left is to, uhm, use it in your favorite proxy: id=101&field=getCreditCard&SUBMIT=Submit.
Web Service SAX Injection
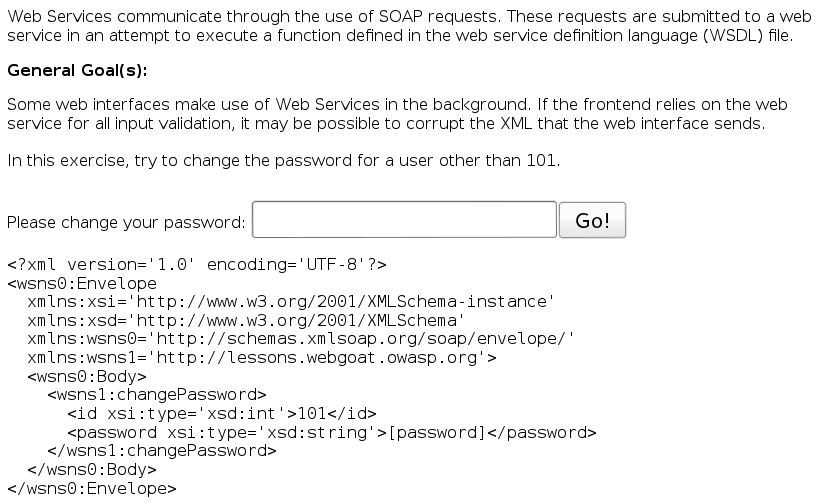
The XML displayed on the page controls the password change. The solution was to add some XML for a user with another id than 101, by intercepting the request and adding the XML data in the password field:
1 2 3 4 | |
Web Service SQL Injection
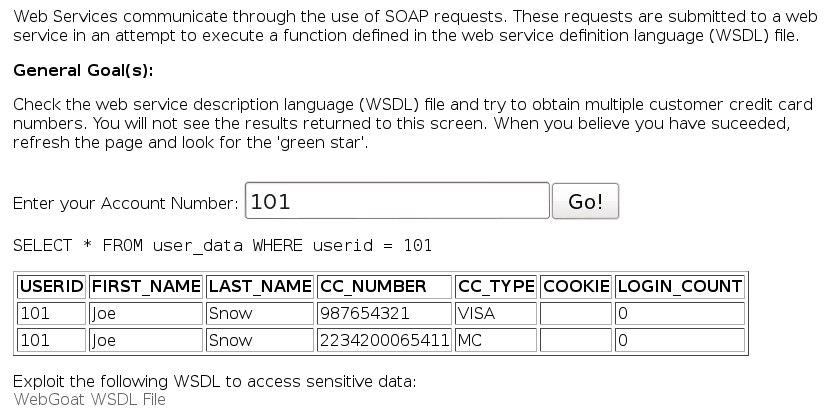
Again, SoapUI comes to the rescue:

Challenge
The CHALLENGE!
Your mission is to break the authentication scheme, steal all the credit cards from the database, and then deface the website. You will have to use many of the techniques you have learned in the other lessons. The main webpage to deface for this site is ‘webgoat_challenge_guest.jsp’
This lesson doesn’t have the option to show the Java code. But from earlier lessons, we know how the Show Java button works:
1
| |
So, we need to go to this URL http://localhost:8080/WebGoat/source?source=true from the lesson page. By looking around in the challenge code, we can see these values:
1 2 | |
We can login now and proceed to the next stage.
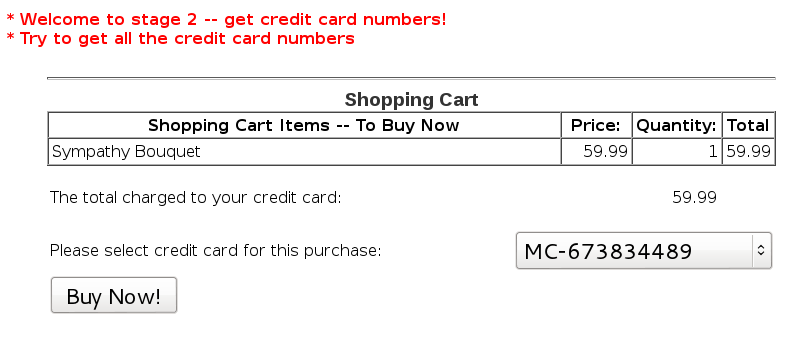
Playing around in WebScarab while sending requests, I noticed this cookie that I haven’t observed before: user=“eW91YXJldGhld2Vha2VzdGxpbms=”;. Decoding the Base64, the value is indeed our username, youaretheweakestlink. So I tried some SQL injection on it, but that seemed to break the credit card solution list. In the end, I thought about encoding the injection, since the data in the cookie was Base64 encoded, and it worked!
The injection string that worked was youaretheweakestlink' or ‘1’=‘1, and the encoded variant was eW91YXJldGhld2Vha2VzdGxpbmsnIG9yICcxJz0nMQ==. It didn’t work until I also kept the username part.
The final stage is to deface the site.

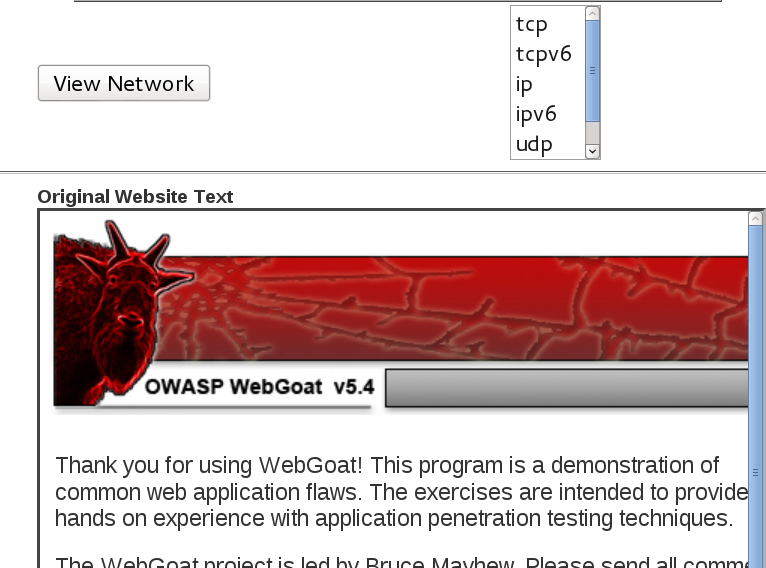
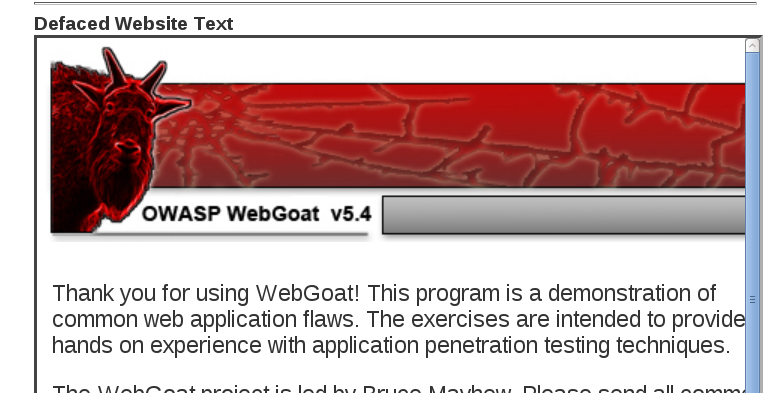
To deface the site, we will exploit a remote code execution vulnerability. We know the name of the file we need for defacing, but we don’t know where it’s located. By clicking the View Network button and intercepting the request, we can see there is a file parameter involved. And we can inject an additional command: SUBMIT=View+Network&File=tcp;find / -name webgoat_challenge_guest.jsp -print -quit. This will tell find to search for the file starting from the root directory, and quit after the first match, otherwise it would take long. And we can see the results printed on the screen:

Now that we know where the file is, we can output some text to it to complete the defacement: SUBMIT=View+Network&File=tcp;echo “We serve free 0 days!” > /root/WebGoat-5.4/tomcat/webapps/WebGoat/webgoat_challenge_guest.jsp.

And, with this, the WebGoat pentest lab is concluded! This was a massive post, and it took me a while. It’s been my favorite web application challenge so far, the amount and variety of the exercises was great, and it covered many common vulnerabilities. Can’t recommend this enough!
Fortune cookie:
You will experience a strong urge to do good; but it will pass.